Field Installation
Standards & Controls
Installation requirements for flowerpots, drop types, sidewalk punches, pit securing, restoration, cable tagging, and as-built documentation — ensuring consistent, compliant execution across every project site.
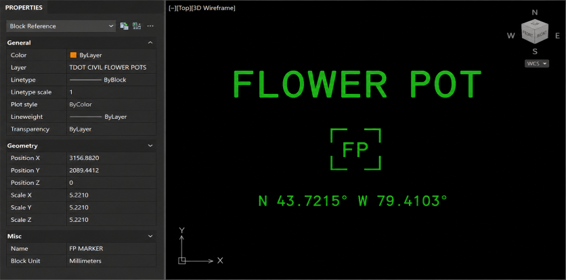
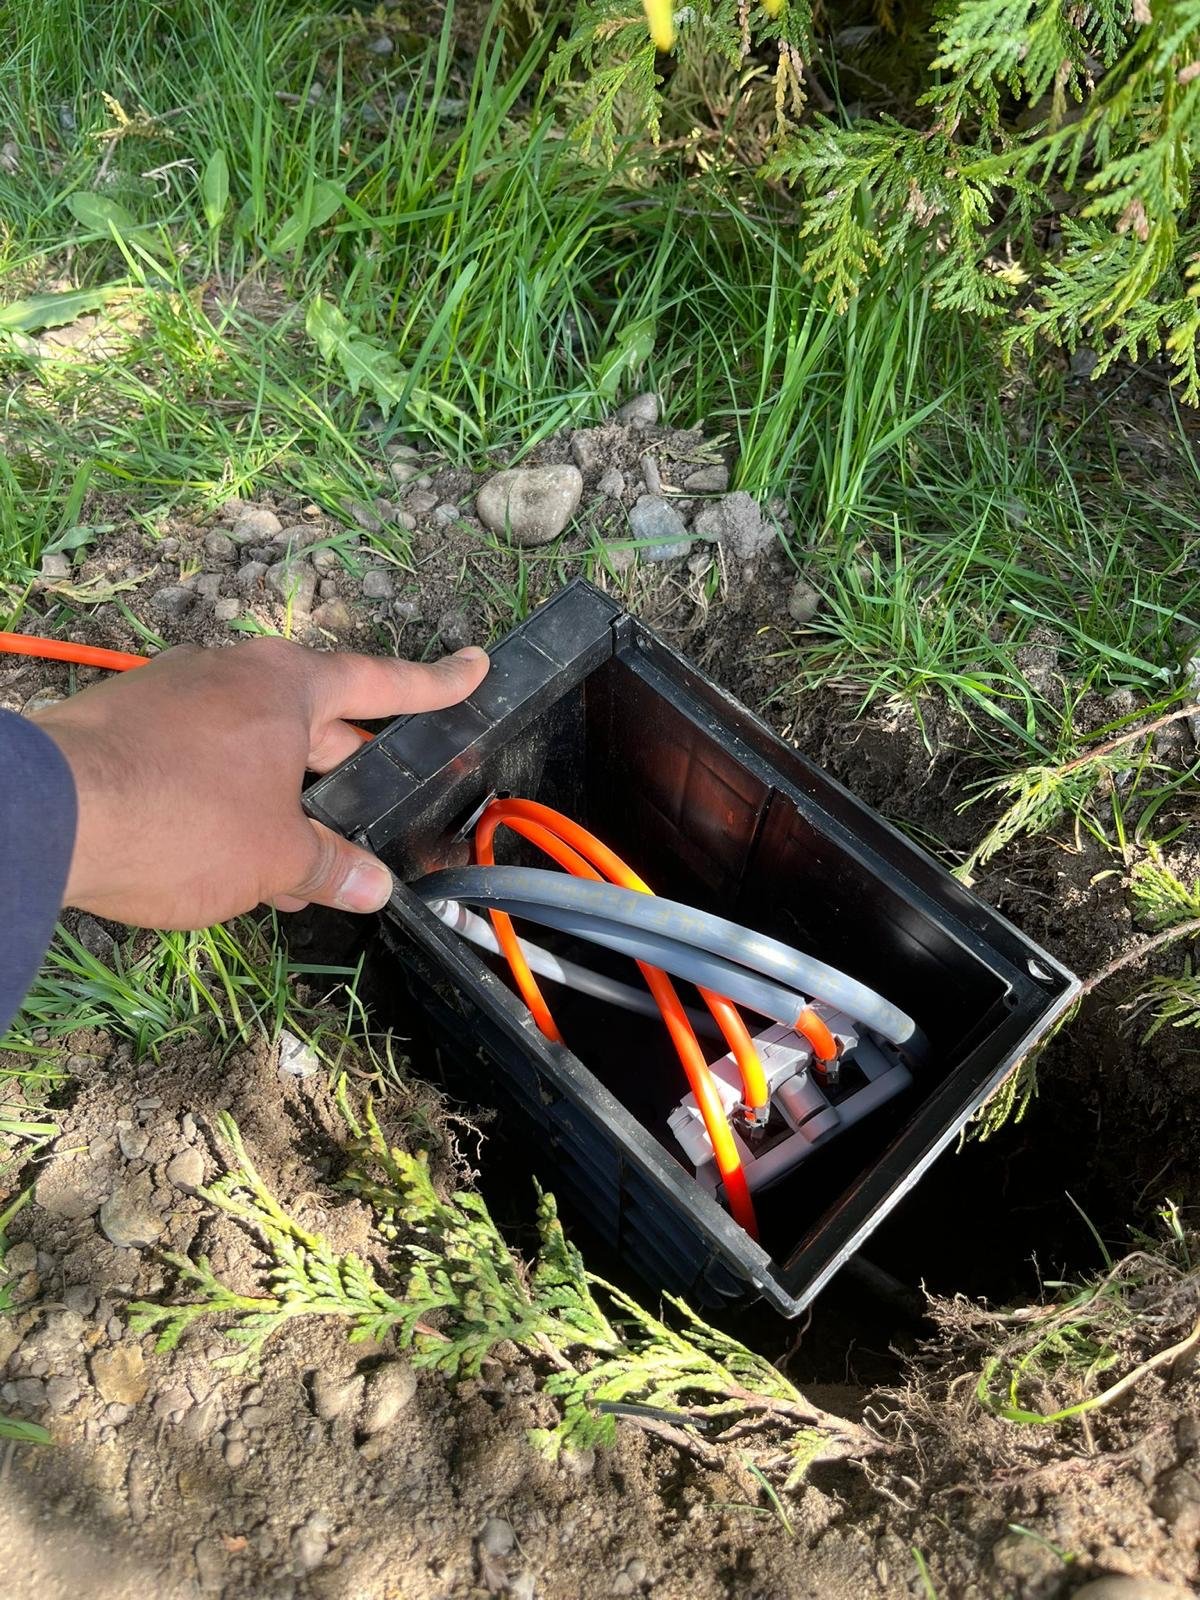
Flower Pot Installation
Every flowerpot is set flush to grade with capped, angled duct and a locate puck in place — ready for clean service connection.
Key Requirement
No coils of duct permitted underneath the flowerpot. Pathway must remain clear and unobstructed. 4–6 inch extension prevents moisture ingress and keeps connection points accessible.
Drop Installation Types
Three approved installation methods depending on existing infrastructure and site conditions. All types must meet the same final readiness standards.
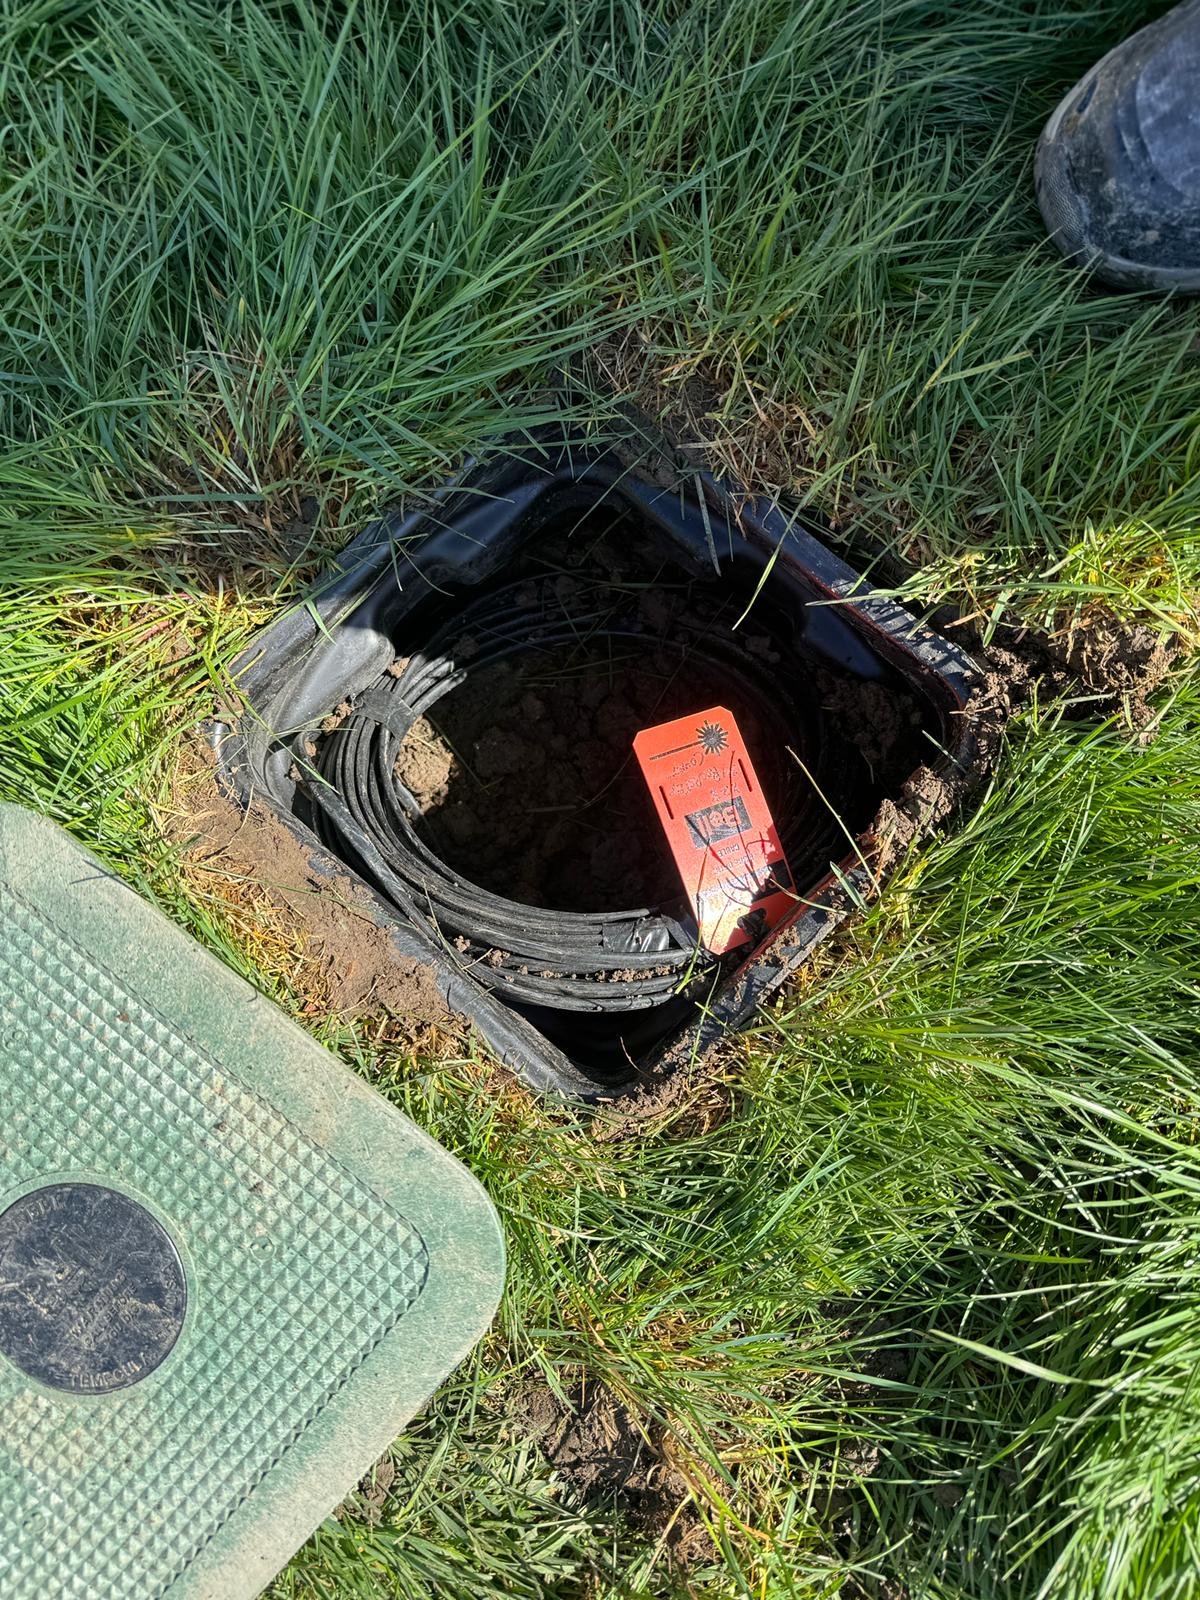
Pre-Jetted Drop
Installed through drilled duct infrastructure from GLB to flower pot, with appropriate slack for service connection.
Drilled Duct InfrastructureDirect Buried Drop
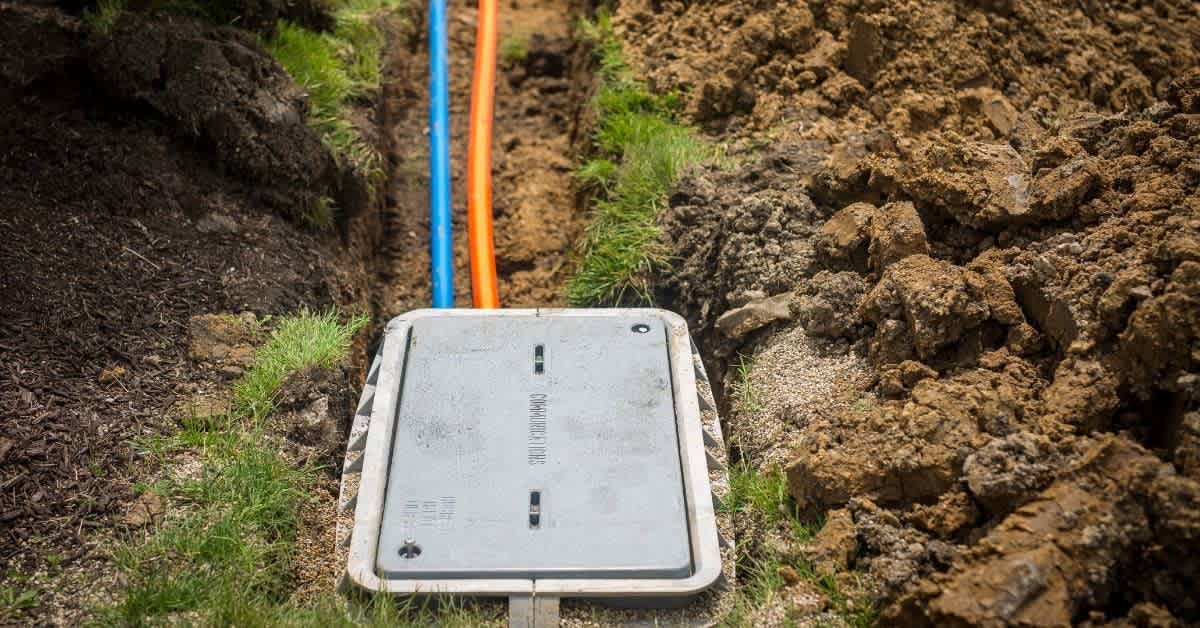
Used where no duct path is provided. Cable is buried along the approved route and protected at crossings where required.
No Duct Path RequiredDirect Drop
Drop is routed through the flower pot and extended directly to the customer demarcation point for final connection.
Customer DemarcationSidewalk Punch Methods
Controlled punch methods to cross beneath sidewalks while limiting surface disruption and protecting surrounding utilities.

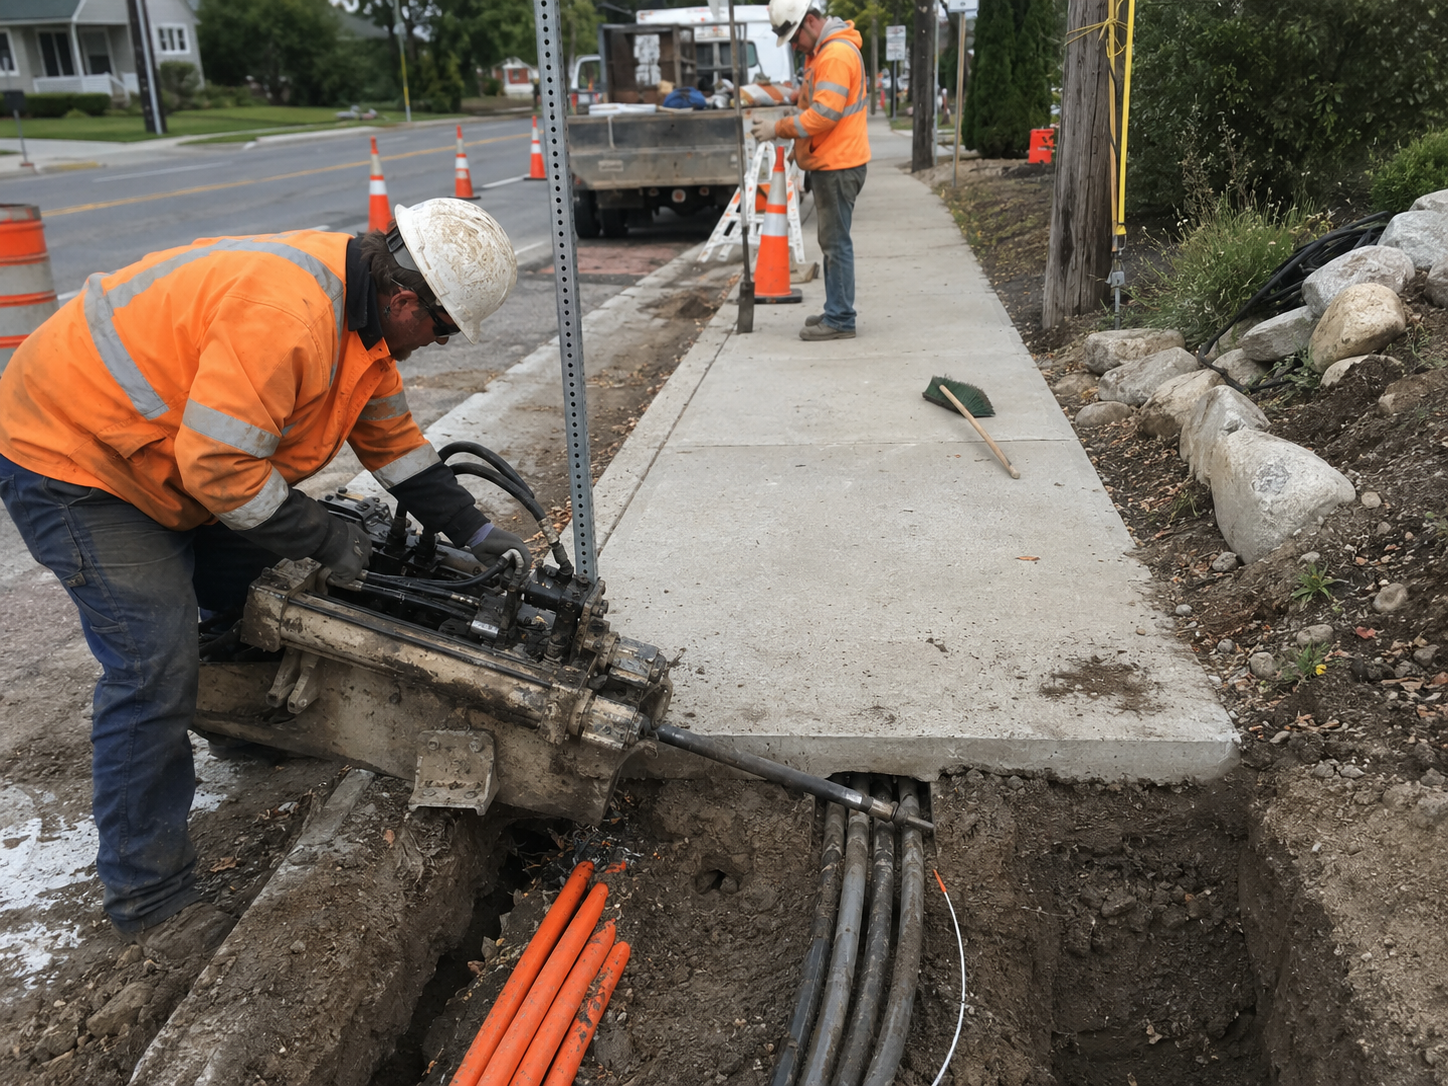
Equipment Approach
Selection is determined by site conditions — soil type, crossing width, and proximity to utilities all factor into the method chosen by the field supervisor. Remote locate review is not accepted.
Three Core Priorities
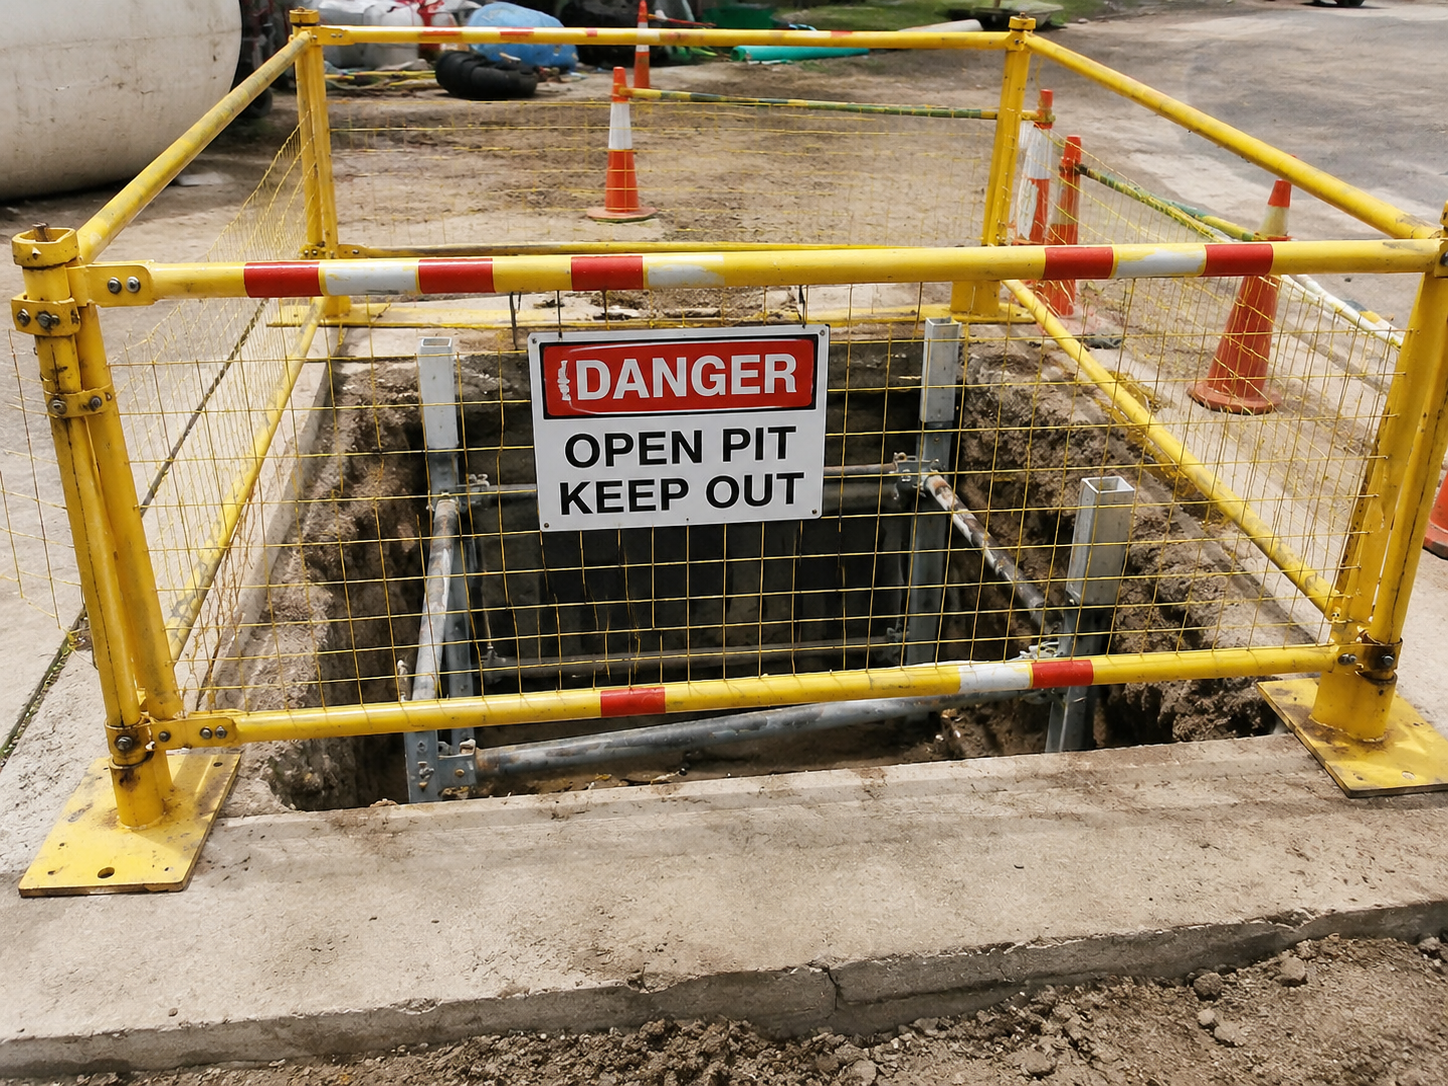
Pit Securing Protocols
Strict pit securing protocols ensure public safety, prevent unauthorized access, and maintain a hazard-free job site throughout construction.
Surface Restoration
All affected areas restored to pre-construction condition or better — soft and hard surfaces finished to municipal and client requirements.

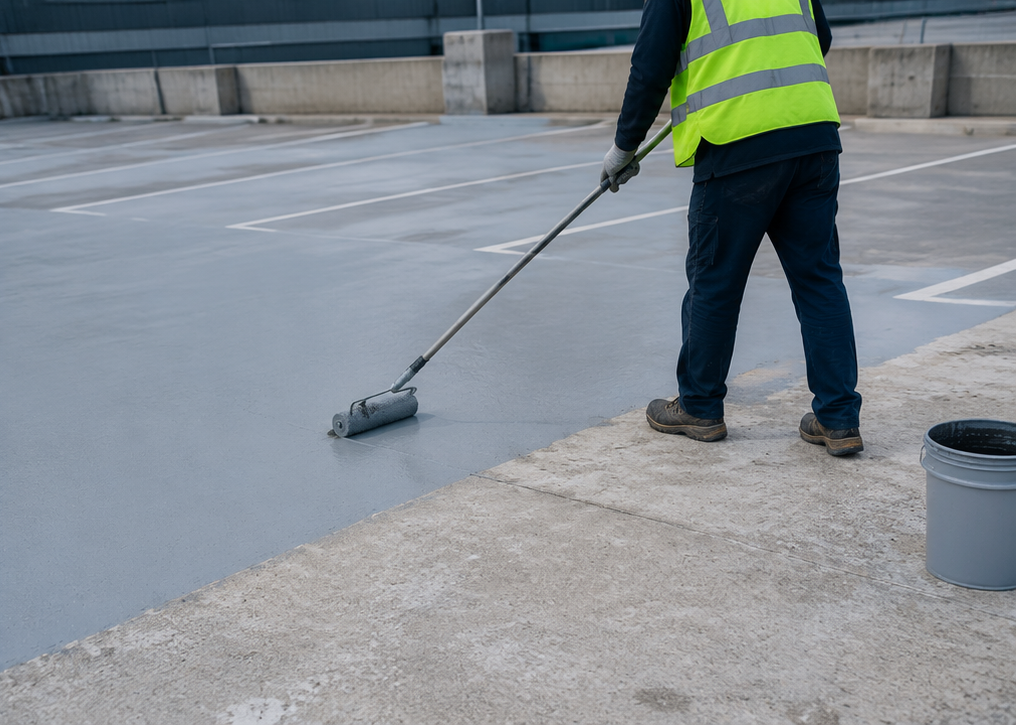
QC Sign-Off
All affected areas restored to pre-construction condition or better. Restoration is reviewed and signed off by QC prior to project close-out submission.
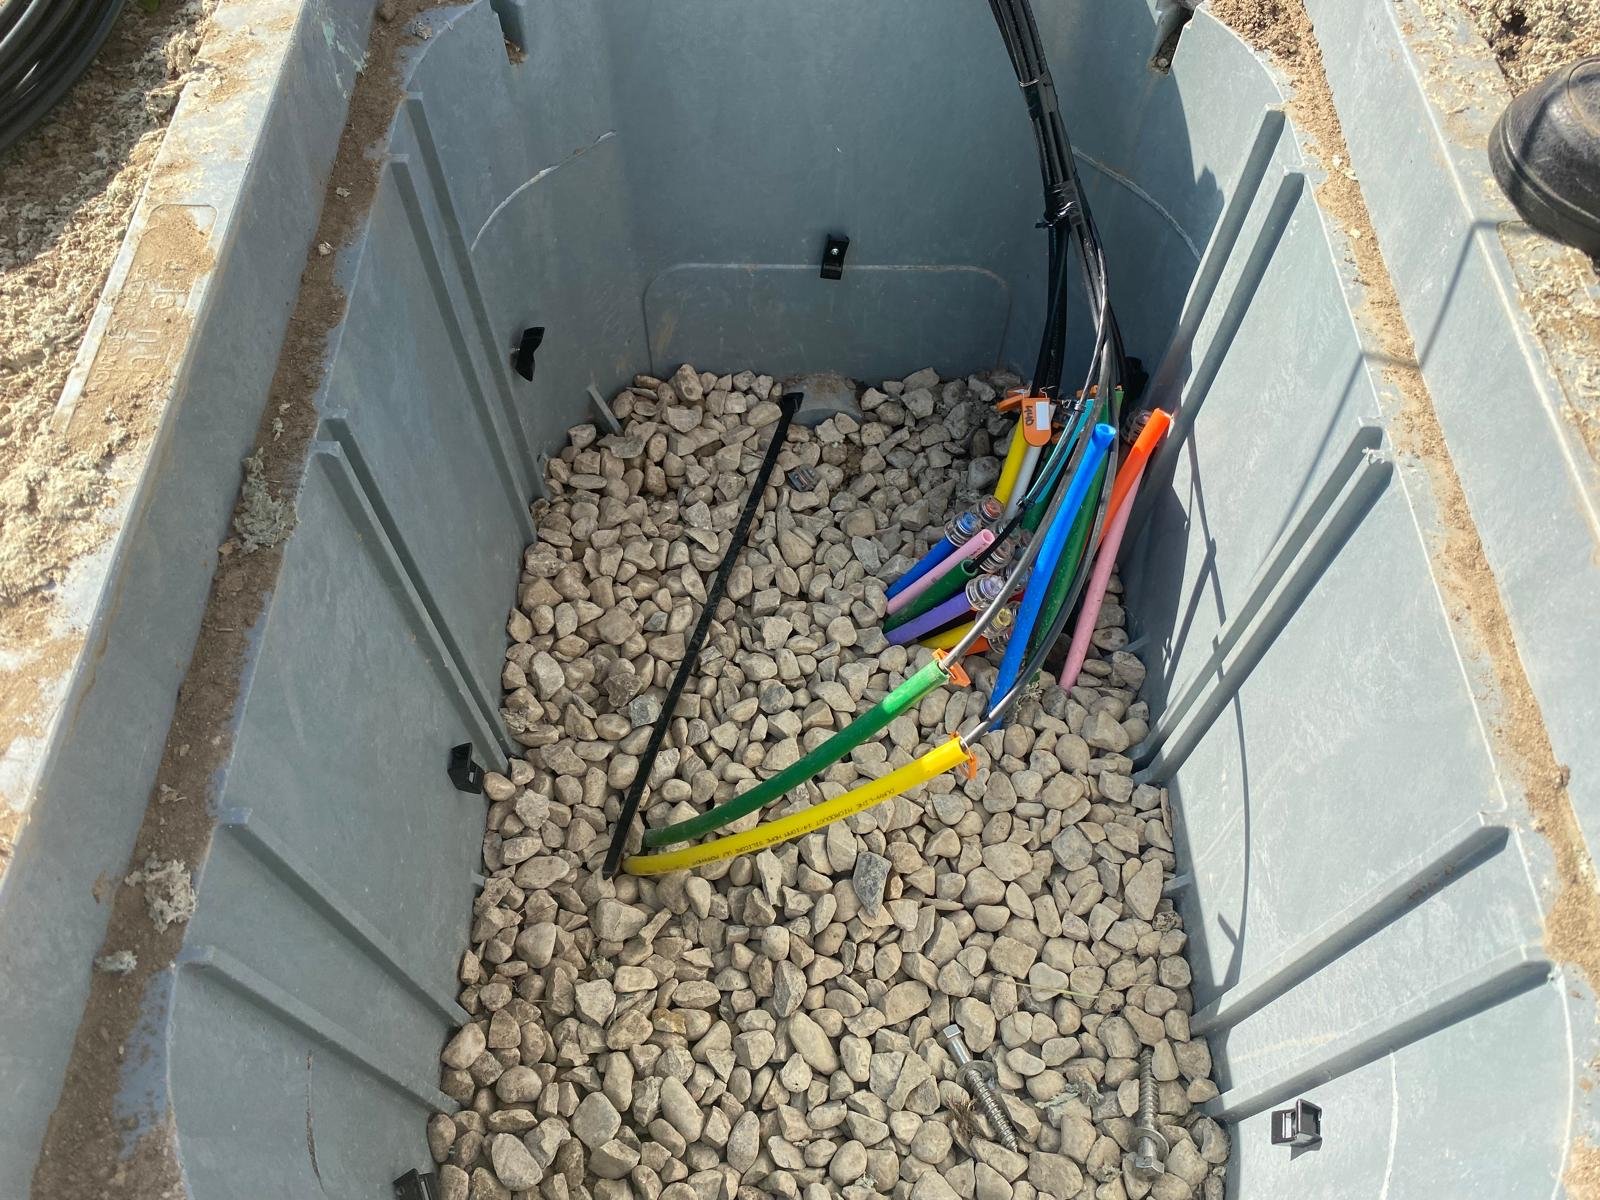
Duct & Cabling Tagging
Clear, durable identification on every duct and cable — tied to civic references and a designated color sequence for fast field verification.
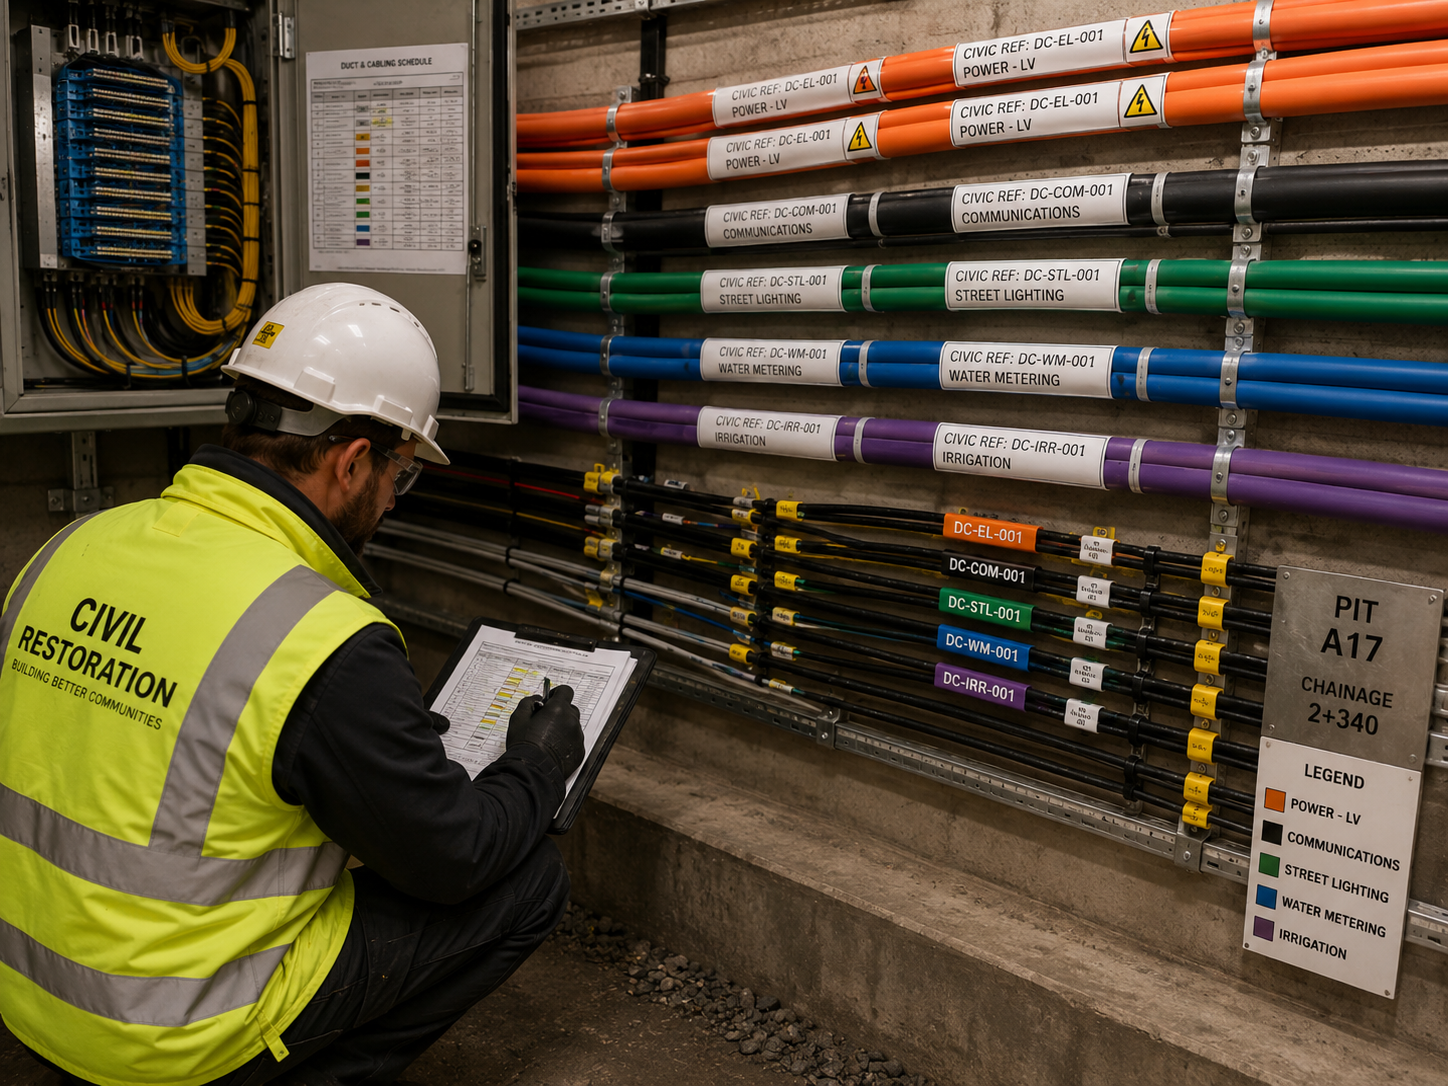
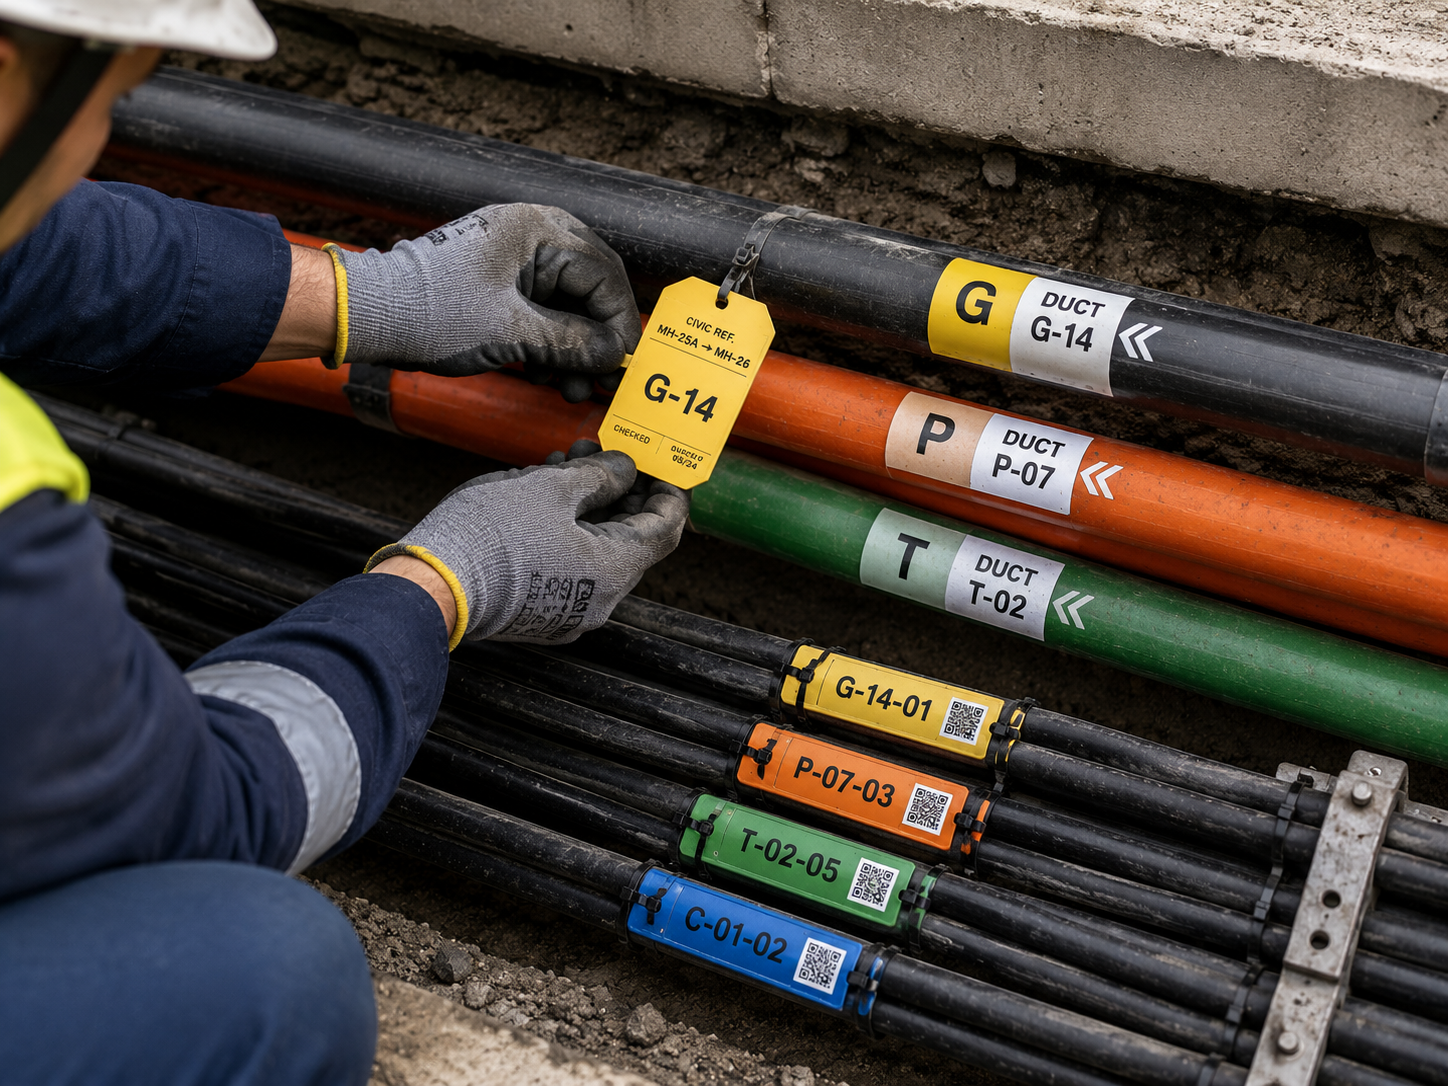
Civic Reference
All tags must include the correct civic reference for clear asset identification across the network.
As-Built & Redlines
Complete, accurate as-built documentation supporting project close-out, field verification, and client record acceptance.